Thursday, 15 May 2014

CHETTINAD Chicken Curry


Chettinad Chicken is among the most popular chicken curries that gets it's origin from the Chettinad region in the southern state of India, Tamil Nadu. This fiery rich curry gets it's flavour and heat mostly from the freshly ground aromatic spice blend, grated coconut and  the curry leaves  and very generous amount of red chillies used to make the masala. However, you can definitely go a bit easy on the chillies.

Chettinad Chicken happens to be one of my favourite curries . Reason!? The use of curry leaves and coconut that makes this dish special and most of all my immense love for South Indian food of course! Be it Dosa, Idli, Uthapam, Sambhar,you name it and I am a game for it.


My version of Chettinad Chicken is very mildly spiced as we do not prefer much heat in our curries. Use of curry leaves and grated coconut as I mentioned before  is a must in this recipe.I have used cashew paste that adds a creamy texture to the curry you can even use poppy seed or melon seed (charmagaz), roasted chana dal paste instead of cashews.
 
As a thumb rule whenever cooking chicken dish of any kind, I always prefer to score and marinate meat at least for an hour if not more. It helps the flesh to absorb the flavour of the spices to the max and as an outcome you are richly rewarded with juicy, tender and more flavourful meat pieces.
 

Lets get to the recipe. The list of ingredients might give you a shock:P But, it's honestly worth the effort and quite conveniently available in every kitchen pantry.
 
To make Chettinad Chicken Curry you will need:

6-8 Chicken drumsticks, skin removed, rinsed and dried.
3-4 tablespoon oil for cooking and extra 1 tablespoon to marinate.(I used canola oil)
salt to season your curry and 1 teaspoon extra to marinate.
8-10 curry leaves for tempering
a pinch of hing or asafoetida
1 medium red onion finely chopped
1 large tomato finely chopped or grated.
1 teaspoon red chilli powder
1/2 teaspoon turmeric powder
1 teaspoon sambar masala
1/4 cup warm water
Lemon or lime juice
To garnish some broken cashew nuts and optional - freshly chopped coriander leaves.
 
For the Dry Roasted Masala you will need :
1/4 cup of grated coconut.
1/2 star anise
1 teaspoon cumin seed
1 teaspoon coriander seeds
3-4 black peppercorns
6-7 dry red chillies, more if you like
12-15 curry leaves
3-4 green cardamom pods
2-3 cloves
1 medium cinnamon stick
1 small ginger roughly chopped
10-12 cloves of garlic
10-12 cashew nuts.
2-3 tablespoon cooking oil to make a paste.
Dry roast all ingredients in a skillet or a frying pan above and make a paste. 


Method:

Step 1: Take your chicken pieces in a bowl and make slits on the flesh ( or score) with a sharp knife. Rub your chicken pieces with oil and salt.

Step 2: Add the ground masala blend and rub all over your chicken pieces, marinate and keep aside. I marinated my chicken overnight, but 5-6 hours is good enough. If you are too pressed for time just an hour is good too.


Step 3: Heat oil on high in a thick bottomed vessel. Turn down heat to medium and quickly add curry leaves and a pinch of hing. (At this stage you can set aside a few tempered curry leaves for garnishing)
 
Step 3:  As the curry leaves splatters add the chopped onion. Once onion start to soften and change colour to golden add the marinated meat along with any leftover marinade. Cook for 2-3 minutes add red chilli powder, turmeric powder, sambhar masala and cook until the masalas are cooked and fragrant.
 
Step 4: Add chopped or grated tomato. Mix well with the chicken and the masalas. Stir and cook well at least for 2-3 mins and cover on medium flame. By now you will see oil and masala  has separated and the chicken is almost cooked through. Add a little warm water, depending on the consistency of the gravy you want. The gravy should be thick, semi dry and not too runny.
 
Step 5. Do a taste test and adjust seasoning of salt as desired. Cover and cook for 5 mins.
 
Step 6: Garnish with some broken cashews and the curry leaves you had set aside(in step 3). You may even use freshly chopped coriander leaves but I prefer not to, let the curry leaves do the magic!
 

Finish off with a squeeze of lemon or lime juice. Dish out and enjoy Chicken Chettinad Curry at it's best accompanied with some steamed basmati rice, pilaf, dosai or any Indian bread. Happy days!
 
 
Enjoy..
 
Dear readers, thank you for stopping by. If you like this post  leave a feedback. For regular updates on more mouth-watering and exclusive recipes  "LIKE" my page on facebook

With deep care

Indrani..

You may also like:

http://eatasulike.blogspot.com.au/2014/07/malabar-prawn-curry.html


Tuesday, 6 May 2014

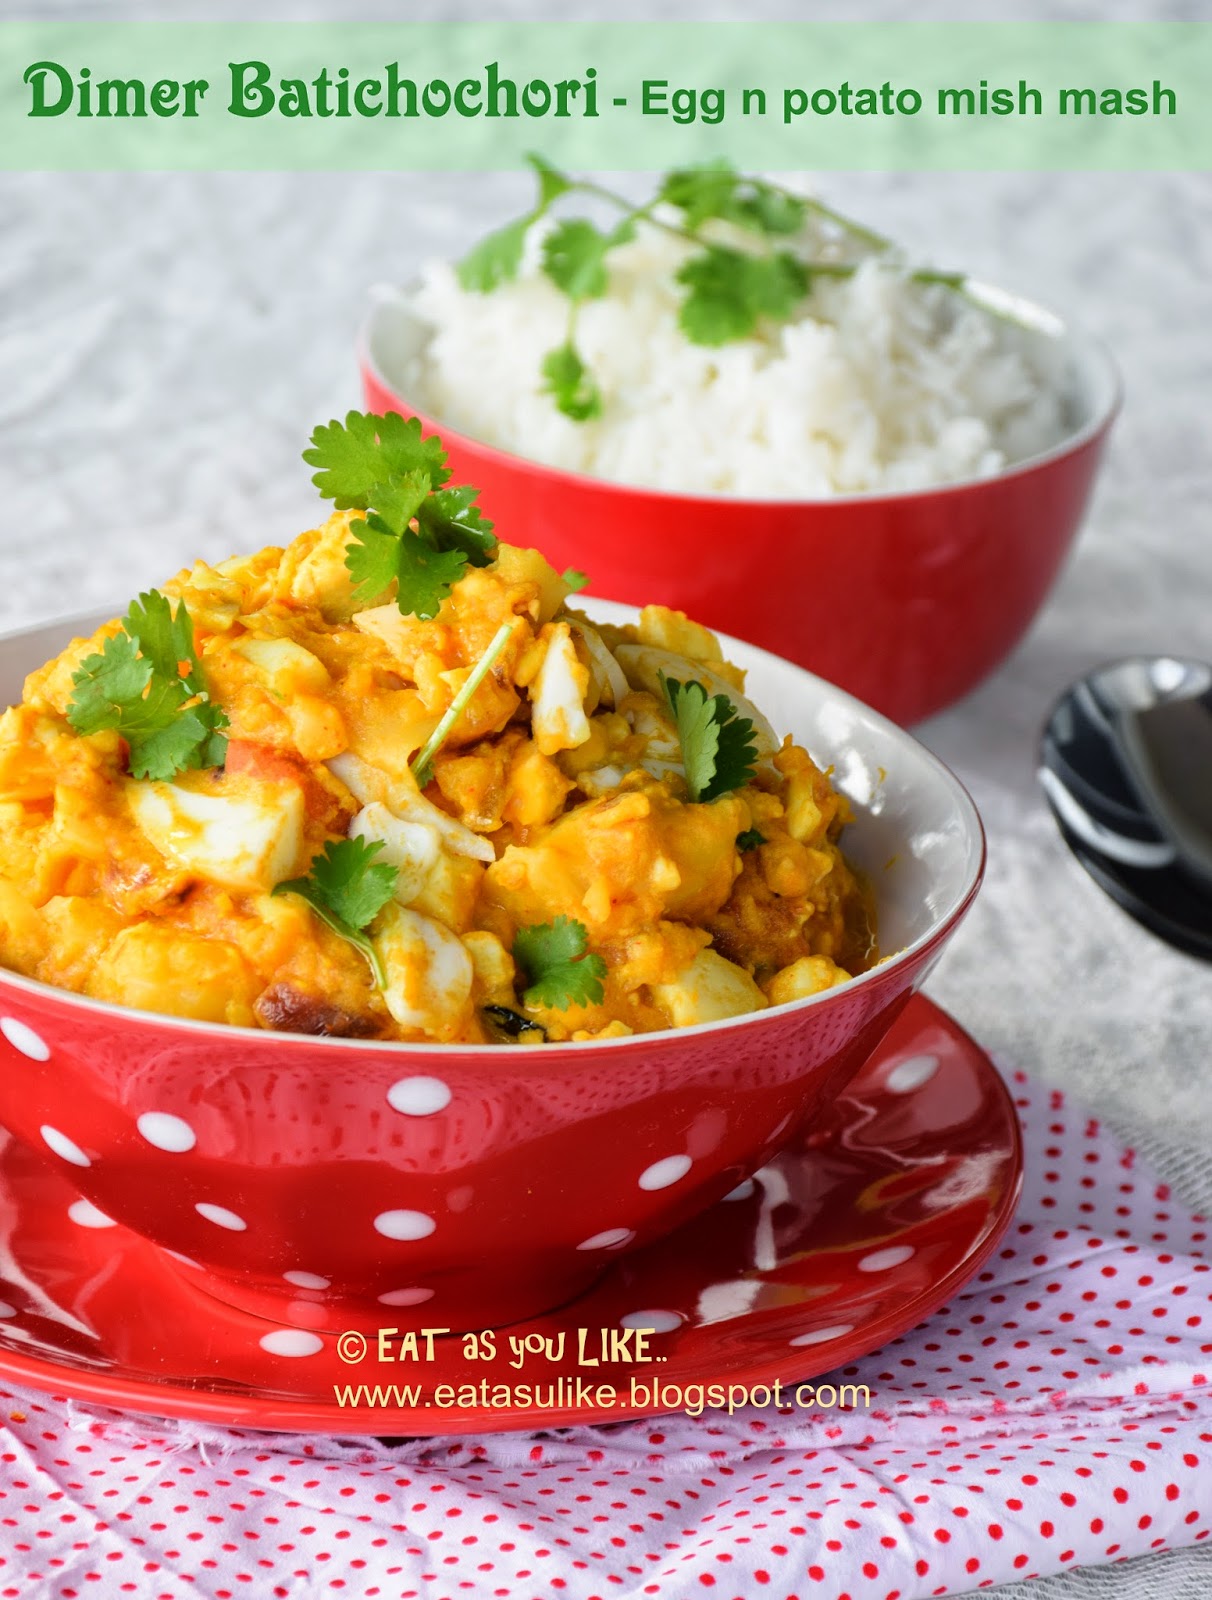
DIMER BATICHOCHORI (Egg n Potato Mish Mash)

 
"Batichochori" or a 'Mish Mash' if you roughly translate it in english, is a very popular Bengali preparation where all ingredients are cooked in one- go flavoured with minimum spices and mustard oil. Yes, mustard oil is a must for that added zing. Very essential for any typical bong preparation. As I have mentioned previously that any other kind of oil used will be a compromise! It is an absolute fuss free, simple to cook dish. This dish can be created using fish, shrimps or just potatoes on its own. I have had all these variations of a batichochori before but this time it was with egg. When I came across this recipe it was very unique to me as I had never heard of or thought of (to be more precise) "Dimer Batichochori", a spicy 'Egg and Potato Mish Mash.' "It is a super easy comfort food for all the egg lovers like me, as said by my friend and owner of this recipe Ms Kolpita Basu, from Mumbai, Maharashtra."
 
 
Recipes that are unique and easy to-do always attract me and I am always on the prowl looking out for one. Moreover, it is a lifesaver when you only have eggs and potatoes left in the pantry or you want to have a real quick fix dinner ready on the table. When I tried this dimer batichochori I was absolutely in love with it's simplicity and yet the delectable taste. The semi mashed eggs and potatoes cooked along with the spices add a beautiful texture and softness to the dish. Without wasting any more time, I approached Kolpita for her consent and here is the recipe for all my readers. Try once, you would want to repeat this again and again!
 
Kolpita, Thank you sooo much for sharing this recipe with us. I am sure all readers of Eat as you Like will fall in love with your "Dimer Batichochori" just like me and my family. This is now a very frequently cooked egg dish in my home. Thank you once again :)


For making Dimer Batichochori I followed Kolpita's recipe from start to end except for a few minor changes in between. So here is the recipe:

To make Dimer Batichochori you will need :

5-6 hard boiled eggs, peeled and set aside
1 large onion sliced or chopped
7-8 cloves of garlic finely chopped
1 small-medium sized ginger finely chopped
1 tablespoon turmeric powder
1 tablespoon red chilly powder
1 large tomato chopped (optional)
4-5 tablespoon of mustard oil
4 medium potatoes, peeled and diced
2-3 green chillies finely chopped or more if you dare
Freshly chopped coriander leaves for garnishing
and extra mustard oil for serving
Salt to taste.


Step 1: In a wok or a thick bottomed pan heat mustard oil on medium flame, now add the onions.
Step 2: Once the onions start to change colour and look translucent add the potatoes and keep frying.
Step 3: Add ginger, garlic and green chillies finely chopped.
Step 4: Keep cooking for a while and once they are nicely stir-fried add the chopped tomatoes.
Step 5: Add the eggs. Add the spices such as turmeric, chilli powder.
Step 6: Keep stirring and mixing all the ingredients and breaking the eggs down roughly with a spatula. Cover on low-medium flame. 
Step 7: By now the tomatoes should soften, add a little warm water, cover and cook until the potatoes are cooked and soft. Add seasoning of salt.
Step 8: Remove lid, check consistency. It should have a mashed look. You may even like to break down the potatoes a bit. Depending on how much gravy you want you may add some more warm water. The dish is more mashy and semi dry and not very runny. Garnish with coriander, some more green chillies and a drizzle of mustard oil.


Serve with steaming hot rice, any bread such as Roti or Chappati or even Luchi (puffy Indian deep fried bread) or as my friend says sandwich it between bread slices and enjoy!


Dear readers, thank you for stopping by. If you like this post  leave a feedback. For regular updates on more mouth-watering and exclusive recipes  "LIKE" my page on facebook


With deep care


Indrani..


You may also like:

http://eatasulike.blogspot.com.au/2014/04/kalakand-milk-cake.html


Tuesday, 29 April 2014

GARLIC PRAWN SPIRALS


Off late whenever I ask my little boy, "What would you like for lunch baby? ", the only answer I get is 'Phaasta -Paawn' and my heart melts:) He actually means Pasta with Prawns. These are the two new words that he has recently mastered and if you ask him any thing about food he will only repeat "Phaasta -Paawn". To this my daughter adds broccis (broccolis) and carrot. Thank goodness that till now they enjoy eating veggies..and I take full advantage of that. LOL  

Since both my kids love pasta it is a very frequently cooked family meal in my kitchen. As we all know it is quick, easy and a filling meal that you can make in minutes. Adding the choice of veggies, prawns, chicken or minced meat you can make a bowl full of  healthy and delicious pasta. Great for those busy week nights and kids lunch boxes. 

My daughter who has just moved to a Montessori Preschool needs to pack lunch from home unlike her days in daycares, and their centre is egg and nut free. They will not allow any food that has egg or nut in them. This was another interesting chapter where I needed little bit of brainstorming. I make her pasta very often for lunch in addition to fresh fruits and yoghurt that goes in, and she loves it. Infact, she only wants pasta and nothing else for lunch.


This recipe yields two generous servings. You will need :

1 Cup cooked small spiral pasta (you can use any other variety)
1/2 cup tail on prawns
3-4 cloves of garlic finely chopped or minced
2 tbsp Butter or olive oil/EVO (2-3 tablespoon)
Half brown onion (chopped) - u may use 2 spring onions as well
1/2 broccoli florets
1/2 cup sweet potato/carrot cubed into bite sizes
1/4 cup milk
1 tablespoon plain flour
1/4 cup Parmesan cheese
1/4 cup cream
3-4 tablespoon chopped curly parsley
Seasoning of salt and white pepper powder
Sweet paprika powder to season (optional)


Step 1: In a  saucepan boil water with some salt and add pasta to the boiling water. Give it a stir and let it cook. Stirring the pasta is essential to avoid clinginess. Once cooked drain and set aside.

Step 2: Rinse the prawns lightly under cold stream of running water. Pat dry with a kitchen towel. Marinate the prawns with 1 tablespoon of chopped garlic and parsley, 1 tablespoon of olive oil and seasoning of salt and pepper. Set aside.

Step 3: Place the veggies in your vegetable steamer and microwave for around 3-4 minutes, maximum 5 minutes in total.  Alternatively you may even blanch the broccoli florets in salted boiling water for 2-3 minutes, remove and dump them in cold water. The broccolis should still maintain their crunch and the colour. In the same water add the sweet potatoes or carrots and cook until tender.

Step 4: In a thick bottomed pan heat little butter or olive oil. Take care not to overheat, add the marinated prawns. Saute them till the prawns turn pink, remove and set aside. 

Step 5: Add some more oil or butter in the same pan. Add rest of the garlic and onion and parsley. Add red capsicum or spinach leaves now, if using. (See notes) Saute them on medium heat. When the onions start turning a bit translucent (we do not need to brown them) add flour, mix and stir on low heat.

Step 6: Add milk, little bit at a time stirring or whisking to make a thick white sauce. 

Step 7: Add the cooked pasta, Parmesan cheese and mix well.

Step 8: Add the cooked veggies and give it  a gentle stir.

Step 9: Add the prawns with all the juices from stir frying. Next pour the cream. Stir and bring everything together.

Step 10: Garnish with some more cheese if you like, and herbs

Delicious and creamy indulgence is ready to be served.


NOTES:

You may try out these alternatives for the sauce:

a. use only cream and not milk (no need to add plain flour)
b. use only milk and no cream in the recipe
c. when pressed for time use store bought white sauces such as carbonara (they'll love) or Alfredo.
d. Any tomato base sauce such as Napolitana, Bolognese etc
e. Combination of tomato and white sauce or cream
f. Use roasted or freshly chopped red capsicum, baby spinach and saute them with the onion and garlic.
g. Replace prawns with bite sized chicken breast. Cook the chicken pieces for a little longer as compared to the prawns.

The opportunities are endless!
ENJOY..
Thank you for stopping by! If you like this post please leave a feedback. For regular updates on more mouth-watering and exclusive recipes  "LIKE" my page on facebook


With deep care


EAT as you LIKE..

Saturday, 19 April 2014

CHOLE CHAAT OR DAHI CHOLE CHAAT


There are certain days when you are absolutely not in the mood for cooking. And if you have a pair of super active toddlers at home enough said! Last wednesday was one such day. There was soo much to be done around the house, and with both the kids at home I was completely exhausted and feeling too lazy to cook anything elaborate.

It was 9.30 pm here and I was leaning back on the couch with my first glass of drink. Yes! the kids are in bed finally and that's  a bliss! It was too much for me to even imagine that I have to cook dinner all over again! The next day's lunch that hubby will take to work was also a question mark. Moreover Thursday is a vegan day so no takeouts!

I asked the husband "dinner-e ki khabe? Ki banabo?" (meaning, what do you want to eat for dinner tonight? what do i cook?) My humble husband offered to get some take-outs. He said "aj ar kichu banate hobe na", I'll get some sandwich (meaning, don't worry about cooking tonight, I'll get some sandwich instead). Ahhhh, my happy soul! what more can you ask for. Great, problem solved, no cooking tonight. But what about lunch tomorrow? Aaargghh! By then I already started to feel  a little better,  you know why! yeah by the idea of takeout of course:P; So finally the glow bulb lit and I thought of making some Chole Chaat. Quick, easy and a healthy meal and no cooking required at all. Voila!! And if you add some yoghurt to it  you have the Dahi Chole Chaat ready on the plate.


Chole Chaat or Dahi Chole Chaat is an excellent brunch, snack or dinner at any time of the day. Especially if you are too busy or too lazy just like me. Life is even more merrier if you have some leftover cooked chickpeas. Easy peasy! So without wasting much time I quickly soaked some chickpeas for the next morning.


Chole or chickpeas have many health benefits. Chaat is basically a savoury dish which has a combination of textures. Infact you will be introduced to all kinds of flavour, texture and taste in a bowl full of chaat. Chaat Masala which is found in most Indian grocery stores, a combination of many spices and black salt is the key ingredient for a dish like this. The base ingredient (chickpea) is combined with other ingredients (such as cooked potatoes, tomatoes, red onions, cucumber), spices such as chilly powder, roasted cumin and coriander, chutnis (such as date and tamarind or green chilli and mint), herbs  such as chopped coriander or mint and finally some yoghurt for that added kick, finished with some lime juice. And honestly there is no perfect recipe. It is dead easy and simple to assemble a Chaat. Depending on your taste and the ingredients that are readily available in your kitchen you can very easily throw in all together and toss it up.


I have divided the recipe into two parts. Both recipes yield 4 servings;

So what do we need :
3 cups of cooked chick peas (soak chick peas overnight, rinse, and cook in salted water)
3/4 cup of chopped cucumber
3/4 cup of chopped red Onions
3/4 cups of tomatoes (seeds removed and finely chopped)
1/2 cup cooked potatoes (peeled and diced)-optional
1/4 cup of chopped coriander leaves
2-3 teaspoon lemon/lime juice according to taste
2-3 tablespoon tamarind and date chutney or more according to taste.
1 teaspoon Spicy Mango Pickle
Green chilli finely chopped as per taste.

Spices:
Chaat Masala (available from Indian Store)
1/4 teaspoon Anardana Powder available from any Indian grocery store.(slightly dry roasted)
Black Salt (1/4 teaspoon)
2 teaspoon groundspices (dryroast handful of Cumin seeds, Coriander seeds, 1 medium dry Red Chilli) and grind all ingredients into a fine powder

Method:
Step1: In a large bowl mix chickpea, chopped tomatoes, cucumber, onion, cooked potatoes, 3/4 of ground spices, mixed pickle, 1 tablespoon of the tamarind and date chutni, lime or lemon juice, 1/2 of the herbs and gently toss and mix ingredients.
Step 2: Garnish with more coriander, the remaining lemon juice and the left over spices and some more of the chutnis if you like.

Enjoy your Chole Chaat for Lunch, Dinner or as any time Snack!


DAHI CHOLE CHAAT :

For a delicious kick to your CHOLE CHAAT add some natural yoghurt.
Additional Ingredients that you will need:
1 cup or more thick natural yoghurt
1/2 teaspoon ground spices as above
1/4 teaspoon chilli powder
Black salt, Sugar to taste
Boondi, Sev(Bhujia) for garnishing (available in Indian Grocery Store)
Method: 
  •  Mix yoghurt with salt, red chilli powder, spices and set aside.
  • After your chole chaat is ready as STEP 1 above add 3/4 cup of the spiced yoghurt, check seasoning. Mix and Toss.
  • Top with remaining yoghurt, tamarind chutni, garnish with more coriander, lemon juice, boondi or Sev as in Step 2 above.
Your Dahi Chole Chaat is ready to be served. Enjoy as a quick fix and a delicious meal or just serve as a spicy and tangy salad.


Thank you for stopping by! If you like this post please leave a feedback. For regular updates on more mouth-watering and exclusive recipes  "LIKE" my page on facebook


With deep care


EAT as you LIKE..


Monday, 14 April 2014

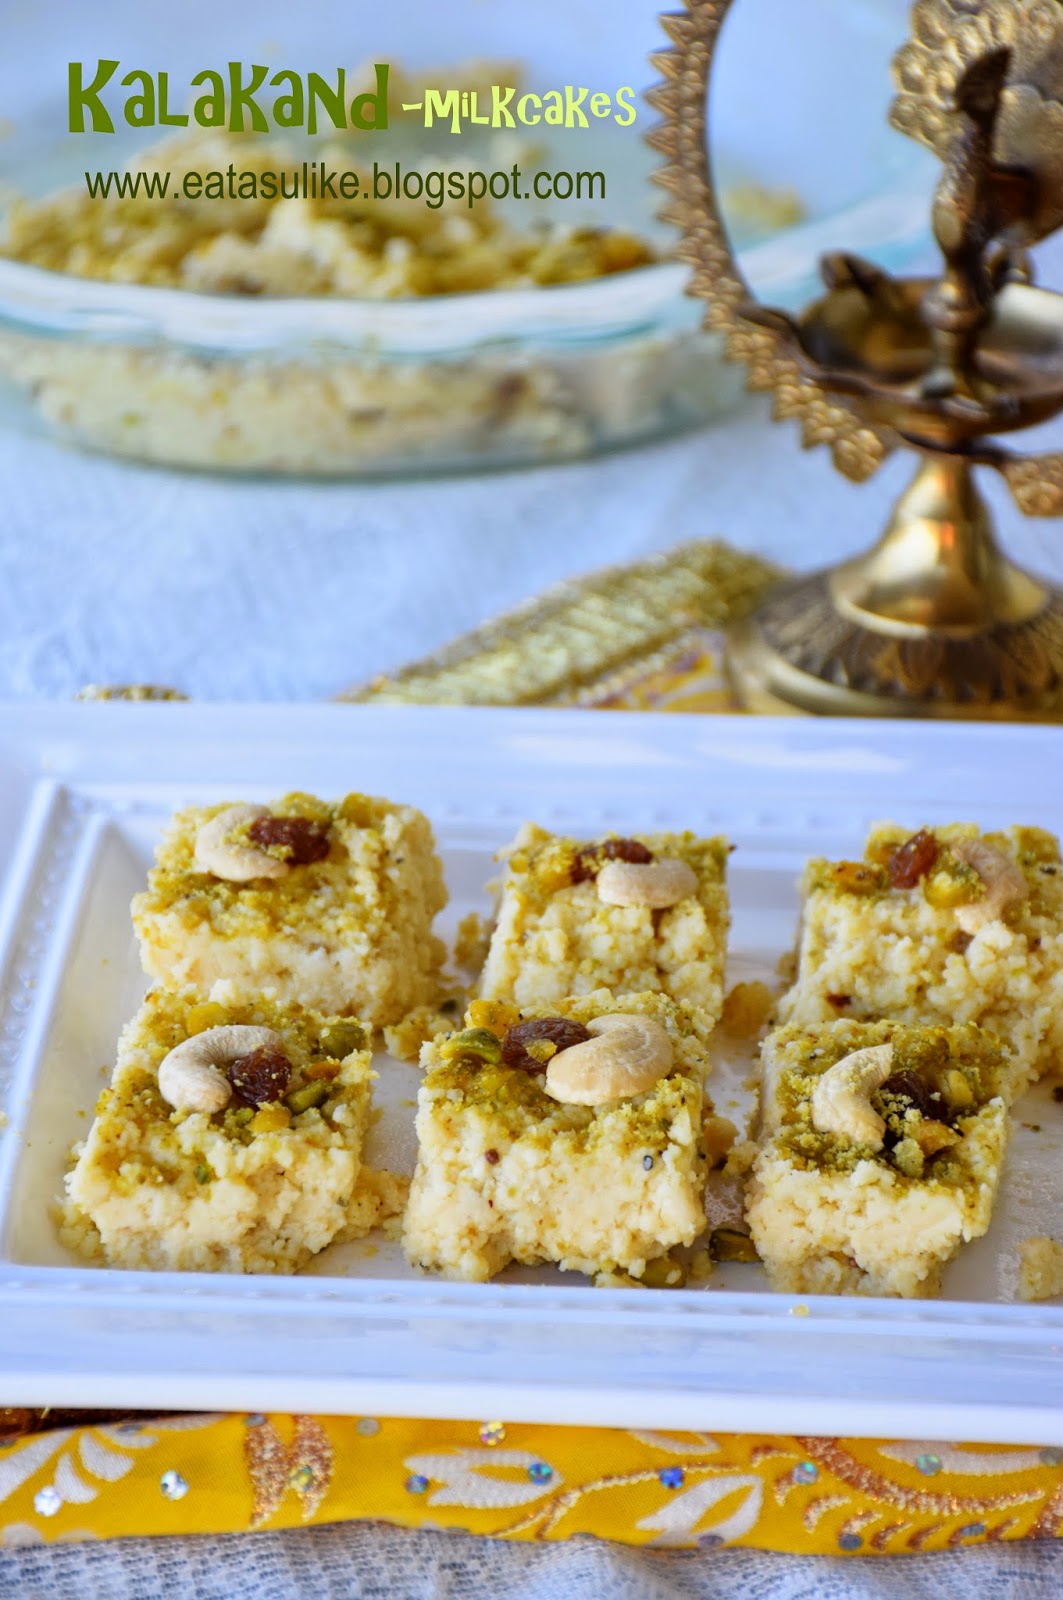
KALAKAND - MILK CAKE

 
Kalakand or milkcake is a traditional Indian dessert made from wholemilk, cottage cheese (chena) and sugar mixed with some ground dry fruits such as cashew nuts, pistachios, and green cardamom for added boost. These milkcakes originate in the district of Rajasthan are soft, moist and crumbly in texture. There are two variations of making kalakand one on stove top which is a bit more time consuming as you would be preparing from scratch or you may also create these beauties in the  microwave. It is a very quick hassle-free and easy way of making perfect kalakands in minutes. Works perfect for me atleast! Why don't you give it a go!


All you need (in both the cases) is to allow some time for the cake to set so that it is easy for you to cut into clean slices.  Always use a knife dipped into hot water to get neat slices of kalakand. That way it is easy to cut through and will prevent the crumbs from sticking on to the knife. I usually refrigerate my kalakands at least for 4-5 hours before slicing , overnight is recommended if you have time.
 
Kalakand is one of my favourite Bengali sweets and yes, for me it even comes after Kolkata Rosogollas. We both (me and the husband) devour this decadent sweet also very popular in Bengal. My 2 year old son is very fond of it.He is a lil foodie you know, just like mummy and daddy :D :D. My daughter who is 3 is just the opposite, not much fond of food though but when it is about these delicious milkcakes she loves them too.

Because of the ease of making instant kalakands in the microwave and being a family favourite I make them quite often during any festivities and celebrations or even potlucks. This time again I made some over the weekend for the Bengali New Year Celebration and thought of sharing the recipe just before Poila Baisakh,( The New Year's Day) with all my valued readers. But my apologies for not being able to get this post out on time. There is soo much happening around the house it is sometimes just too hard to sneak in time for yourself. If not now,make sure you save this recipe for future use. Your guests will be very impressed, and that's a promise!
 
So let's take  a look at the recipe. And before we do that let me wish all my foodie friends celebrating this time a very happy Puthandu, Bihu, Navreh, Ugandi, Vishu, Baisakhi ,Gudi Padwa, Chaiiti and Cheiraoba, may this new begining bring in good health and happiness into your beautiful lives. And to all my Bengali readers " Shubho Naboborsher anek preeti, subhecha o obhinandan. Notun bochor khub bhalo katuk shokoler" 
 
 
Today's recipe is the instant microwave version. I learnt this trick from one of my Aunt's. She uses cottage cheese and condensed milk, whereas I have used ricotta cheese for it's silky and granular texture. Using either in the recipe is absolutely fine. But remember to use only homemade cottage cheese. The cooking time given in this recipe is approximate and may vary depending on the microwave you are using. This is a very easy recipe and you cannot go wrong. If not the first time, some trial and errors over time will give you the perfect result. However, having said that the end result is still edible and a delicious form of rabri.
 
You will need :
500 grams of Ricotta Cheese
125 grams of Cream Cheese
350 grams of Condensed milk(I used 3/4 of the tin only)- increase or decrease amount as per you liking.
few drops of rose water
Few raisins (soaked in warm water) and cahews (slit from the middle) for decoration.
For the ground powder:
15-20 Pistachios
10-12 Cashews
7-8 Green Cardamon Pods
In a food processor or blender lightly crush the nuts on pulse mode  and set aside.
 
You will also need:
 
A deep round or square good size micro proof dish. A tablespoon to stir and mix
Cling  or foil wrap
Some warm water and a sharp knife for slicing.
 
 
Step 1: In a micro proof dish mix all cheese, and condensed milk and half of the crushed nuts, sprinkle few drops of rose water mix well into a smooth mixture just as in the picture below. Making sure there are no lumps in the mixture.

 
Step 2:Slide into your microwave. Mine @ 1000 W was in for 7 mins the first time.
  
STEP 3: After about 7 Mins the mixture will look some what like the picture below. Without removing the dish give it a good stir and mix well.

Step 4:Set the microwave to about 8 more mins, stoping half way(@4 mins) and stirring, continue to cook for another 4 mins. It should look like this in the picture below. Sprinkle some more ground nuts and mix.
 
Step 5:Cook for another 7-8 minutes or so in total. Stirring half way in between. It will also release some water but do not worry as it will dry out eventually. This "in- between" break is very important to get the right consistency. 

 
Step 6: Continue for another 4 - 5 mins. Stiring in between at about 2 mins or so. The mixture should look like this as in the picture below. Creamy, sticky and grainy.
 
Tips:1. If your cheese mixture is still runny , as cooking time may differ for microwaves, cook for few minutes more (2-3 mins at a time) stopping and stirring in between. Very Important!
Tip 2. If you are close to the desired texture after about step 5 reduce cooking time as in Tip 1.Keep a close eye and make sure the mixture does not dry out too much and crumble.
 
Step 6:Once your mixture looks like in  the above picture carefully remove from microwave using oven gloves. 
 
Step 7: Mix gently and push to one side (into a half circle)of the same dish just as in the picture to set. Using a flat knife press the edges to ensure atleast 1/2-1cm thickness. Gently press it down and allow to cool. Sprinkle with the remaining pistachios, cashew and cardamom mixture. Sprinkle some more rose water.
 
Step 8:Cover with cling wrap and refrigerate for at least 2-3 hours. More the merrier.
 
 
FOR SERVING:
 
Step 1: Take some hot water in a glass, and dip a sharp knife. slice the milkcakes into square, decorate with cashews and raisins.


Serve and enjoy this melt in the mouth gourmet dessert with your family and friends!!


If you like this recipe please leave a feedback. For regular updates on more mouthwatering and exclusive recipes  "LIKE" my page on facebook


With deep care


EAT as you LIKE..
01 10