Thursday, 13 March 2014

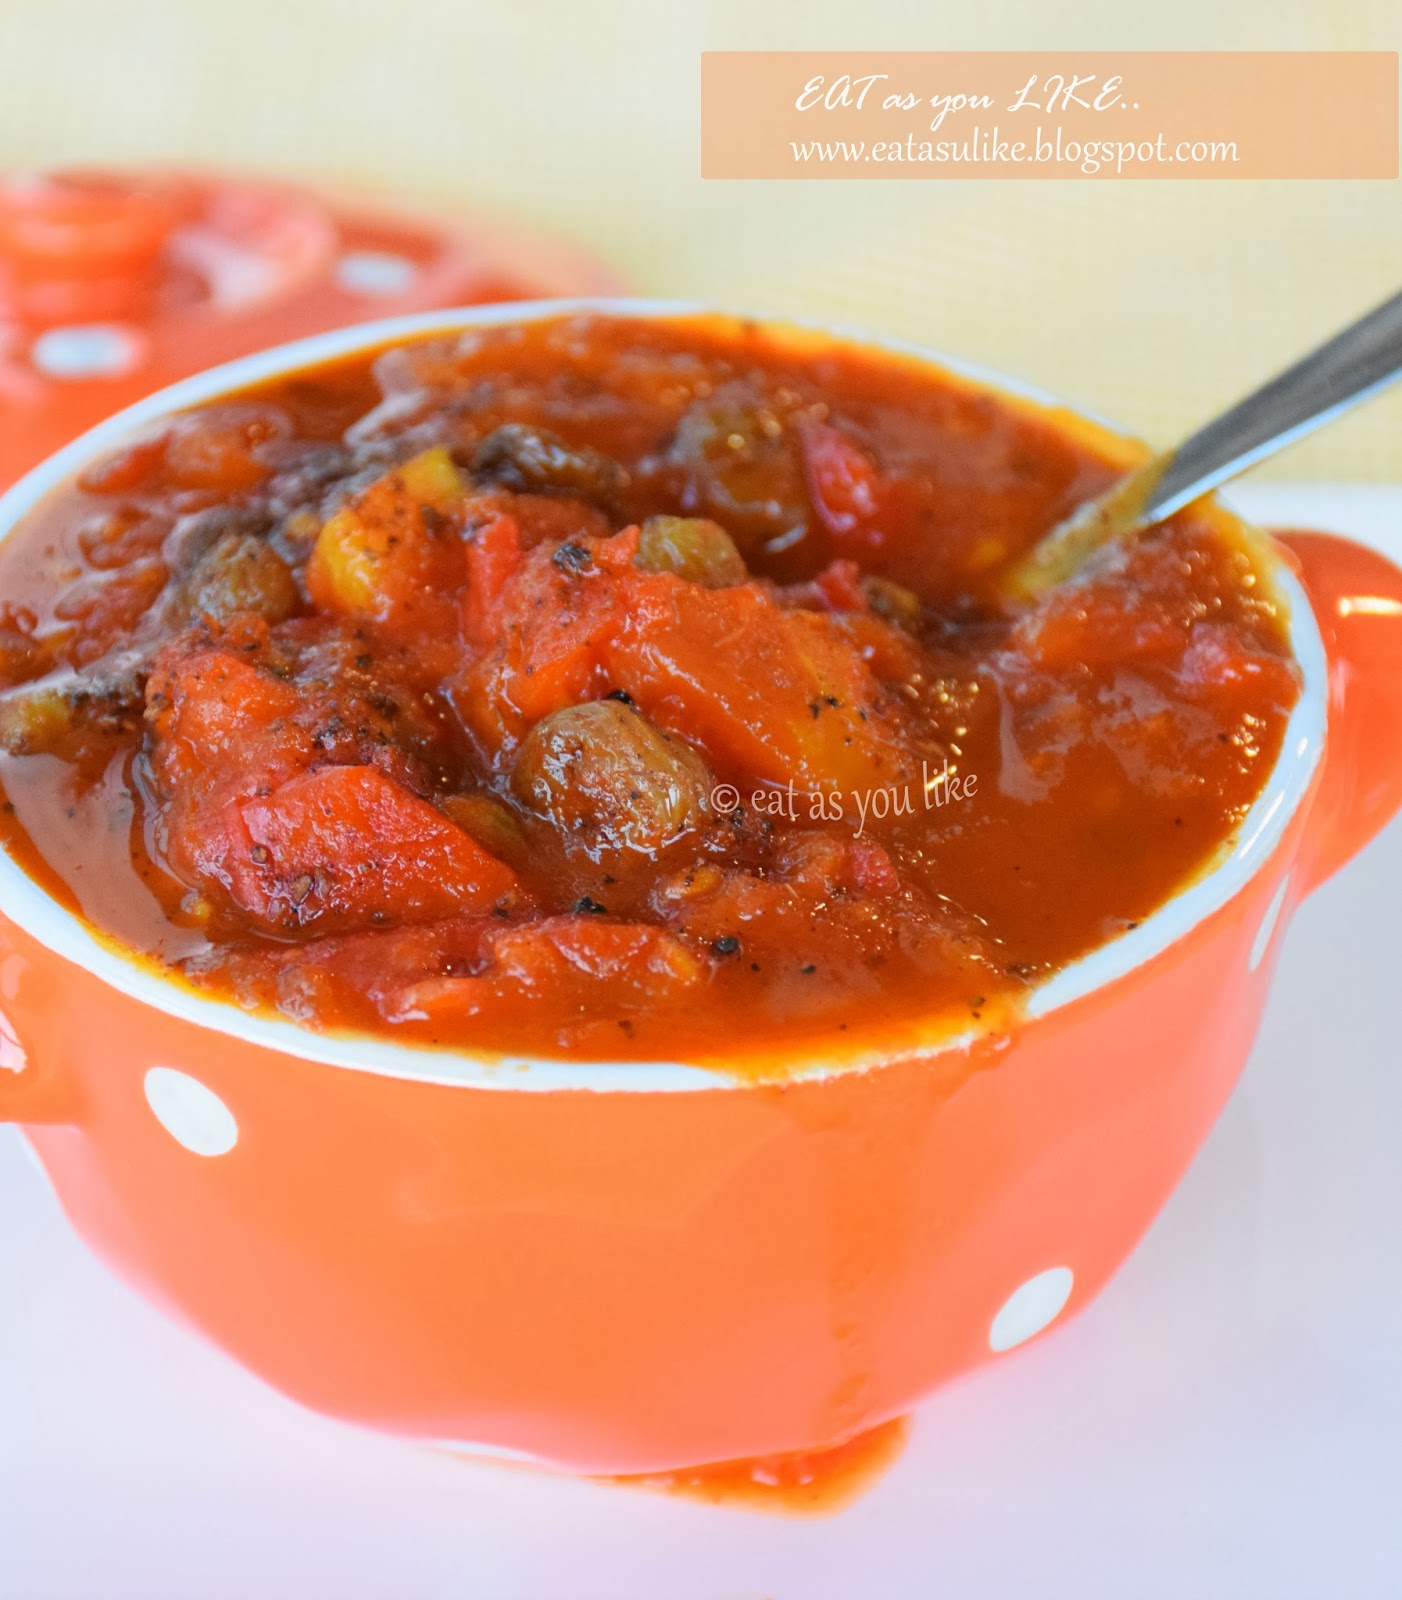
CHICKEN MEAT BALLS KORMA CURRY

 
When it comes to cooking for my little ones I am always on the look out for new ideas. Some thing different in terms of taste and texture. Offering variety to your child helps in developing healthy eating habits. So today's recipe is meat balls made with minced chicken and herbs cooked in delicious creamy raisin tomato and yoghurt gravy. Meat as we all know is an excellent source of protein and iron to satisfy your child's hunger and provide essential nutrients for their healthy growth and development. Eggs are another fabulous source of protein but it can be a cause of serious egg allergies in some children. The below recipe contains egg, so please be mindful of your child's dietary needs or issues if any. In addition to meat, fish and egg, veggies and fruits form a very essential part of your babies diet. Bear in mind that if your child is picky and not a greatest fan of veggies you are not alone. Having said this, there are means and ways of adding vegetables into your little ones diet.
 
 
Grating or blending veggies into meat balls, soups or sauces to add to pastas is a brilliant way to sneak and hide some extra goodness. Grated zucchini is barely visible! And so is carrot or broccoli. . The only side effect is your child will not learn to like vegetables. It is very important to remember that every kid may have to try a food ten times at least before they learn to accept it. So try to be consistent by offering variety in terms of taste, texture and striking a balance to do a bit of each, blending, grating and offering some veggies as a whole. This is my experience  that I have gathered and learnt over the last 3 years and it gives me soo much joy to be able to share it with you all today.
 

Okay, so now over to the recipe.

To make 20  medium meatballs you will need:

500 grams chicken minced
1 medium read onion finely chopped
2 cloves of garlic crushed and finely chopped
1/2 zucchini or carrot grated
1 tablespoon sweet soya sauce
1 egg lightly beaten
1 tablespoon tomato paste
1 tablespoon light soya sauce
some lime juice
seasoning of white pepper
1 cup bread crumbs
2-3 tablespoon of finely chopped coriander or parsley or combination of both.
1/4 cup tasty cheddar or parmesan cheese works great, if you may. ( I did not add cheese this time)
1 tablespoon Extra Virgin Olive Oil or Canola Oil

(For Adults you may spice it up with some chilli and black pepper!)

 
Step 1: In a bowl mix mince, garlic, onion, grated veggie, egg, breadcrumbs, sweet soya sauce, tomato paste, lime juice and breadcrumbs. Mix everything together and roll them into balls. In order to get perfect meat balls take some warm water in a bowl , wet your palms each time you roll the them. This will prevent the meat balls from sticking.
 
Once ready refrigerate, covered with a cling film for about 30 mins. 
 
 
Heat oil in a large non-stick frying pan over medium heat. Cook meat balls turning 8-9 mins each side for approximately 20 mins or so or until browned. Transfer to a plate. If you are planning to serve the meat balls on their own here you have them ready.


Allow to cool , check temperature before serving. You may serve with their favourite dip or sauce.


These meat balls are great snacking option and  make excellent finger foods for your little bundle at about 8-9 months. I have pan fried them in this recipe as you can see, baking is great too.. specially for young babies. Simply preheat oven to about 180 degrees and slide in the meat balls nicely arranged on a grease proof baking sheet for about 15-20 mins or until they turn golden.
 
You do not need to add any extra salt or sugar in the recipe. The Meat balls get enough seasoning from the soya sauce and the tomato paste. The chicken stock used in the gravy  will have enough salt that is needed and the raisins are the natural sweeteners. Recently I have learnt (from a very knowledgeable source) that raisins act as cleansers and are excellent for kids. I have also read that raisins are rich and concentrated source of energy, vitamins and minerals such as iron and calcium to name  a few.
 
To make Korma Curry you will need the following:
 
1-2 tablespoon of extra virgin olive oil/or any other cooking oil that you prefer
1 medium red onion grated.
1 teaspoon each of ginger garlic paste
1 teaspoon each of coriander and cumin powder
1/4 teaspoon turmeric powder
1/2 cup yoghurt
1/4 cup raisins/sultanas made to paste (use chicken stock to make paste)
1/2 cup diced tomatoes /canned.
1/2 cup chicken stock or water.
1/4 teaspoon garam masala powder
coriander of parsley finely chopped to garnish
 
 
Step 1:In a large non-stick wok or pan heat oil and add the onion. Fry the onions till they change color .
 
Step 2: Add ginger, garlic paste. sauté for a few minutes   
 
Step 3: Add turmeric, coriander, and cumin powder. Again sauté for some more time and add the tomatoes. Keep sauting until the tomatoes change colour absorbs moisture.
 
Step 4: Add the raisin paste that you made. Cook for some more time add chicken stock. Remember the korma gravy is thick and not runny. Bring to boil and as the sauce start to thicken add the meat balls carefully, give it a gently stir. Simmer and cook with a lid on for about 7-8 mins or until the meat balls are cooked. 
 
Step5 :Remove lid and stir in the youghurt. Sprinkle garam masala powder and the herbs.
 
Your meat balls are ready to serve. Serve warm with Rice, Pilaf, or cooked Couscous.Couscous is cooked semolina that you can get in supermarkets, cook as per instruction on the packet. 

 
Enjoy..

If you like this recipe please leave a feedback. For regular updates on more mouthwatering and exclusive recipes  "LIKE" my page on facebook


With deep care


Indrani..


Wednesday, 12 March 2014

CHICKEN CHAAP

 
Chicken Chaap is a mughlai inspired chicken dish where juiciest part of the chicken on bones (specially the legs and thighs) are marinated then charred and finally slow cooked in the aromatic spicy gravy. Poppy seed and Sattu (bengal gram flour, added by some restaurant) are one of many essential ingredients for Chicken Chaap. Poppy seed adds a beautiful silky texture to the dish and either sattu/or chana dal paste plays an important role in absorbing the excess moisture,  binding all the spices together, by helping the spices  to cling to the meat. The gravy for chicken chaap is never very thick, but light and thin formed from the fat released from the ghee (clarified butter) and the meat. Since I do not get good quality sattu here in Adelaide I have used a close substitute chana dal (split chick pea) made to paste. This dish can vary from mild to rich and spicy. This semi dry gravy is best enjoyed with Biriyani ( a flavourful dish of rice and meat) or any other indian bread variety such as nan, romali or tandoori roti, laccha paratha with some onion cucumber salad on the side to make it a complete meal. My first introduction to Mughlai cuisine was at Bedouin on nandy street around gariahat.Their speciality was the succulent chicken or egg-chicken roll, chaap and biriyani and if you are one of many to dine in the restaurant ,having made a reasonable order their complementary "jaljeera" drink was quite a hit! In no time this restaurant was soo popular that they opened up a few franchises around the area .
 

Rahmania, Sabir, Amenia was also good during those days.Then finally Shiraz, the legendary mughlai food joint opened it's doors. My first taste of authentic chicken chaap, a delectable moist chicken biriyani still lingers onto my taste buds! Yes, it was way back in early 2000 and during our courtship days that I had my first taste of  mughlai cuisine at The Shiraz Golden Restaurant in park circus, Kolkata. Courtesy my one and only..I know u guessed it, right!!:D
 
Both Bedouin and Shiraz were excellent in terms of their food quality. Even now when we visit our home town this authentic food joint is always on the cards for their exclusive mughlai dishes. Last time when we were in Kolkata we noticed that the old Shiraz Golden Restaurant has moved down across the road and a brand new Dawaat-e -Shiraz has come up on the ground floor of the Tulip Inn Hotel serving more or less the same quality food but just because it is more of a polished version of the old Shiraz, prices are a bit too high in my opinion. But the staff are no doubt very professional and helpful (unlike old shiraz) and thank fully there is a valet parking for the patrons which otherwise would have been a nightmare! Arsaalan in park circus (7 point crossing)  is another exclusive joint if you are after some mouth watering Awadhi or Mughlai cuisine. In addition to their Biriyani, chaap and rezala our personal favourite was Arsalan's special kebab wrapped with cheese and egg..they are truly to die for!


You must be thinking that the process of making chicken chaap at home  is quite a complicated one. Trust me, it is not. And neither you need any grand ingredients to create the authentic taste. The recipe is a quick fix one, you just need to get a bit organised first, score and marinate the chicken which is essential and most of all pocket friendly ingredients have been used in this recipe.  I personally find cooking chaap much more easier and less time taking  as compared to any other chicken dishes that needs more elaborate cooking. I usually marinate all ingredients well in advance, sauté and then slow cook on simmer for the melt in mouth result. As I am always pressed for time this recipe works very well for me and yet delivers authentic restaurant style flavours
 
To make Chicken Chaap all you will need :
4 chicken marylands (leg and thigh portion) or 1 whole chicken cut into 4 quarters.
1 cup natural thick yoghurt ( I used greek style). If you are using normal curd or natural yoghurt drain out the excess water by placing it in a cheese cloth or a sieve for couple of hours.) In that case approx. 11/3 cup of normal curd will yield around 1 cup or little more of hung curd - making sure the curd has still some moisture and not too dry.
2-3 cloves
2 sticks of cinnamon
3-4 green cardamom pods
11/2 tablespoon coriander powder ( u may use freshly ground)
2-3 tablespoon of besan or gram flour, dry roasted 
1 tablespoon Kashmiri Red Chilli Powder
1/2 tablespoon Turmeric powder
2 tablespoon poppy seed(soaked in water and then made into paste) -( non-negotiable ingredient.)
1/4 teaspoon of mace powder
1/3 teaspoon of nutmeg powder
1 large onion roughly chopped
10-12 fresh garlic cloves or 2 tablespoon garlic paste
3/4 tablespoon ginger paste
little drops of keora water (2-3 tiny drops)
Ghee or clarified butter 2 tablespoon
White oil for cooking 2 tablespoon
11/2 teaspoon salt and 1 tablespoon oil for coating on the chicken
extra salt for seasoning
1 tablespoon of ground spices
(Roast 2-3 black peppercorns, 7-8 cardamom pods, , 5-6 cinnamon stick, 7-8 cloves - dry roast them and then grind them in a food processor or a mortal and pestle and store in an airtight container ) 
A good size thick bottomed skillet
kitchen tongs and spatula
 

Step 1 : Rinse your chicken pieces. Pat them dry with a paper towel. Score on the skin with a sharp knife. Now coat your chicken with 1 tablespoon oil and salt all over and every nook and corner of the bird. Cover and let it rest.
 
STEP 2: In a blender or food processor add chopped onion, garlic, ginger paste, mace powder, nutmeg, chilli powder, turmeric powder, coriander powder, ground masala, roasted besan, poppy seed  and by adding little bit of  yoghurt at a time blend to a  smooth paste.
 
Step 3 : Pour the spice mixture onto the chicken and coat well along with very little drops of keora water . Cover with a cling film and set aside . Overnight is best or atleast 5-6 hours.
   
 
Step 4: In a thick bottom skillet heat 2 tablespoon ghee and 2 tablespoon cooking oil. You may choose to use ghee only and not use any oil at all. In that case add 3-4 tbsp ghee. The skillet should have enough room for 4 large legs of chicken.
 
Step 5 :Now add the whole garam masalas such as cardamom, cloves and cinnamon.
 

Step 6: Shake off the excess marinade and lay the chicken pcs side by side. The flame should be medium-high. Once they start to change color (little golden brown) on one side you may flip it using a kitchen tong to brown the other side as well. Do not over cook it.. cook until they look a bit charred and golden brown on both sides. 
 
Step 7:Once the chicken pieces look a little golden make a well in between and pour in the remaining marinade. Keep sautéing with a spatula to fry the marinade mixture . It will soon change colour and release a lot of oil. Add the poppy seed or paste along with the sattu or chana dal paste. Keep turning the chicken atleast a couple of times. Use a spoon to smear the chicken pieces with the marinade mixture that is already cooking. This will keep the chicken moist and prevent from drying out. Once the spices start to separate completely from the oil, making sure that the chicken pieces are nicely smeared in the gravy, simmer and cover. Before that check seasoning and add more salt to taste. Cook for some more time. Let's say around 10 mins more.. Turn off heat and allow to rest.
 
Step 8: The gravy should be semi dry with the spices almost clinging onto the chicken pieces, leaving the excess fat floating in the skillet.  You may garnish with some ghee and  another tiny drop of keora water to finish it off.  Your Chaap is ready to be served with your favourite rice dish or bread.
 
 
This recipe will yield 4 generous servings. The gravy will be very mild in terms of spiciness. If you want more spicy and rich gravy you may adjust the amount of chilli and spices according to your taste. Ghee or clarified butter can be used solely to cook the dish. However I prefer to mix some oil to keep the calorie count low. I hope you enjoy some Chaap with your favourite bread or rice.
Have a blessed day!
 
 
Enjoy….

If you like this recipe please leave a feedback. For regular updates on more mouthwatering and exclusive recipes  "LIKE" my page on facebook


With deep care


EAT as you LIKE.
 

Monday, 3 March 2014

CREAMY SALMON CHOWDER


Chowder is a  classic French version of a thick seafood or a vegetable stew cooked with either milk or cream. I make this stew very often for my little ones as i can add in milk, fish and veggies all in one bowl to make it a super nutritious meal. 

Few days ago on one of the social networking site i came across a post where a concerned mum of a 1 year old wanted a few tips and suggestions as to how to get her toddler to drink milk.. I think we all know that it is a very common problem faced by most mums (including myself) and our mothers  too;-) I, myself used to hate milk more than any thing else.. none of my toddlers take milk as a drink either..and as i have been there myself the mess and the stress that it brings along as a package is not worth at all, no matter how hard you try it is only *them* who will win the battle at the end of the day! Sooo what choice do we have as mothers?! Just relax and enjoy a bar of chocolate :-) and having said that, on a serious note some clever cooking might be of help !
 

As I did my own research I found that as long as your little one is getting enough dairy (that can be in any form) be it cheese, yoghurt, custard etc.. it is fine. Hence, why not we mums need be a bit sneaky and  try adding milk into our toddler's food. Adding milk to soups and sauces is an excellent way to get  some dairy into your child's diet. So here i share with you today the recipe of the Creamy Salmon Chowder that has the goodness of milk, veggies and fish all in one bowl. But hang on, just before I do that may I remind you to check on " your child's special dietary needs if any, such as allergies or lactose intolerance etc, etc" Please consult your family doctor or your child 's physician in case in any doubts.


The base idea and inspiration of this recipe is from "Jamie's 30 minutes meal". I have used Salmon fish here in the recipe but feel free to use any other boneless white fish fillets that is available to you ( or whatever fish your little one likes to eat). But make sure you do personally check out for any bones before adding the fish in to the soup. 
Salmon is known to be very high in OMEGA 3 Fatty acids (the good fat), calcium and is one of many few food that has Vitamin D in addition to other nutrients. The veggies can be of any combination  you may grate or chop as you prefer or depending on the texture that your child likes.
 
Try using Avocados another treasure trove of nutrients.
 
Awesome bowl food for "expecting" or "nursing" mums and "younger babies" too. Once your little peanut has graduated into solids (at about 8 or 9 months) this french stew is a delicious and healthy way of introducing fish and cow's milk into your babies diet. You may blend or fork mash the chunky bits to adjust the texture.Serve with some multigrain or wholemeal crackers as finger foods.(see notes 1) 
 
So mums, hoping that this is convincing enough lets take a look at the recipe. To make my version of the Creamy Salmon Chowder you will need:
 
1-2 tablespoon olive oil/butter
1 Salmon fillet/steak (boneless) medium size.( rinsed and chopped into bite size pcs)
2-3 spring onions chopped
1-2 cloves of garlic crushed 
Bay leaves 1-2 small ones
1/4 cup combo of sweet potato (cooked and diced) , cooked carrot (diced ) or grated
1/4 cup potatoes cooked and mashed lightly
1/4 cup sweet corn kernels and green peas 
1/4 cup broccoli florets cooked
1 tablespoon of plain flour
1 litre chicken stock
11/2- 2 cups of milk ( i use full cream)
1/4 teaspoon of white pepper (see notes)
1/4 cup of parmesan cheese
1/2 teaspoon finely chopped herbs of your choice ( i used dried oregano and basil), chopped parseley or chives or thyme is good too.
1 teaspoon butter  or olive oil to serve
You will also need a whisk, a thick bottomed saucepan and a potato masher.
Yields 4 generous servings.
 

STEPs for making the Chowder:

Step 1 :Get your  thick bottomed saucepan on high heat. Add Olive oil.
 
Step 2: Add bay leaf, spring onions green and white, stir fry and add garlic. Saute for some more time until fragrant.
 
Step 3: Add the fish, sprinkle white pepper and fry until the fish is cooked. Turn off heat now add plain flour and stir well to coat the fish, garlic and spring onion mixture.
 
Step 4: Now turn on heat and add chicken stock little bit at a time stirring ( or whisking) continuously to get a thick creamy consistency. Making sure there are no lumps at all. You may like to use a small whisk at this stage. Bring it to boil.
 
Step 5: Once you get a smooth texture add all the veggies. Add milk and herbs. Cover and cook for another 2-3 minutes and bring to boil on medium heat.
 
Step 6: Turn off  heat. Sprinkle parmesan cheese and add a knob of butter.
 
You do not need to add extra salt as the chicken stock and cheese will have salt in them. But if you must , do a taste test and adjust seasoning. If the stew gets too thick add more warm milk to get the desired consistency.
 
Your Creamy Salmon Chowder is ready to be served. Check temperature and adjust texture before serving. Spoon into their favourite bowls and serve warm.
 
Notes 1:If you want to offer mixed texture you may do one thing,toss the fish chunks in olive oil first with very lil seasoning and set aside. Once the stew is cooked and blended you may shred the fish chunks before serving. Your baby will take a while to adjust to and accept any new texture and taste.. so allow some time.. through consistent trial and error it will only get better..i was told "patience is the key!:)"
Notes 2: If cooking for adults or older kids you may fry some diced bacon just before adding spring onions. And at the end you may even add small prawns (just before adding milk) to boost the flavour. Substitute cream for milk if you like or use in 1:1 ratio. U may also use some black pepper for seasoning as well. Enjoy this gourmet with some crusty bread or crackers.


Enjoy….

Thank you for stopping by! If you like this post please leave a feedback. For regular updates on more mouthwatering and exclusive recipes  "LIKE" my page on facebook


With deep care


EAT as you LIKE..


Tuesday, 25 February 2014

TOMATO CHUTNEY

 
Hello everyone! After almost 4 weeks here I am to share with you my most awaited post. I wasn't sick or away, life has been incredibly busy over the last few weeks. So, today I will not bore you with a long story. It's a very simple and my favourite Tomato Chutney recipe that I will share with you today. If you have read about "The Legendary Chicken Curry " my first post on Bengali cuisine, I talked about an elaborate multi course meal that is enjoyed in every Bengali household and chutney is served as the last or second last course after the mains and just before desserts (if any). It is an indispensable item on the menu in every Bengali occasion be it wedding, birthday, or even religious functions. Without Chutney, be it of any kind a hearty Bengali meal is just incomplete!

Back home I used to see my mother making chutneys of different kinds. Tomato, mixed fruit, pineapple, date, raw mango, plums and even star fruit to name a few. Maa was a chutney expert with the variety of chutney recipes that she had mastered over time. We sisters, including my father were Chutney devotees..soo ma would make it every single day for us. My husband enjoys this Chutney with rice as a last course, my personal favourite is Tomato Chutney and Poppadums (or papad), to me it's "a match made in heaven"!
 
In my childhood days I had some strange eating habits (and that is something I still do ;), I like to mix my share of chutney with some chicken curry. Yummm!! Life is too short to get serious and sometimes it is fun to be weird: D Soo try it, it tastes amazing..:)

 
Okay, so enough of the Chutney story and now it's back to business, the recipe! I made this exactly the way Maa (my mother) makes it . For those of you who are not much familiar with Bengali Cuisine we use a special 5 Spice or (Panch Phoron) for tempering the oil. The Bengali 5 spice comprises of the following: Nigella seeds, Mustard seeds, Fennel seeds, Cumin and Fenugreek seeds. I also roasted a teaspoon of the above combination of spices and ground them to sprinkle on top just before serving. Some like to add a whole dry red chilli, we personally prefer not to. But if you like go for it and add when you temper the oil with the spices. Alternatively, you may even roast a proportion of the chilli (depending on the amount of heat and spiciness you want to add to your tomato chutney) along with the spices and ground everything together to sprinkle on top. This recipe should yield 4 generous servings.
 
 
To make Tomato Chutney you will need:
6 medium size ripe Tomatoes
1 teaspoon cooking oil(mustard oil recommended)
few pinches of turmeric powder
1/2 teaspoon of the Bengali 5 Spice (Panch Phoron)
3-4 tablespoon of Sugar (add acc to your taste)
Pinch of salt
1 teaspoon of lemon juice
Handful of Sultanas or raisins
1 teaspoon of dry roasted and ground bengali 5 Spice (Panch Phoron) to sprinkle.
 
Once you have all your ingredients ready follow these simple steps.
Step1: Rinse tomatoes and chop them into cubes.
Step 2: Take a thick bottomed pan or wok. Add the oil.
Step 3: Once the oil is hot enough add the spices and once they start to splutter add the tomatoes.
Step 4: To the above add turmeric powder and pinch of salt.
Step 5: Mix and stir well and cover on low to medium flame. Once the tomatoes are cooked and start to melt break every lump with your spatula to make it mushy as shown in the picture.
Step 6: Add the raisins or sultanas.
Step 7: Add sugar. Mix everything well. Bring it to boil .Cover and cook for another 5-7 mins. Turn off heat.
Step 8: Add lemon juice.
Step 9. Transfer into a serving bowl and sprinkle the ground spices. Allow to cool. Tomato Chutney is usually at it's best when served chilled.
You may even enjoy this chutney as a side to your favourite Indian bread. I like it with parathas. Try some fusion. Dip your favourite savoury cracker and enjoy. What's stopping you!
I couldn't believe my 22 months old little boy finished almost half the bowl LOL;
Eat well and be happy!
Have a wonderful week ahead:)

Enjoy….

Thank you for stopping by! If you like this recipe please leave a feedback. For regular updates on more mouthwatering and exclusive recipes  "LIKE" my page on facebook


With deep care


Indrani..


Tuesday, 21 January 2014

ROASTED RED CAPSICUM and BUTTERNUT SOUP


Soup is my all time favourite. It is the most frequently cooked meal in my kitchen. And why not, it is quick, easy, healthy and appetizing. What more reason would you need for a bowl full of creamy indulgence. A perfect comfort food for chilly nights served with some crusty bread or croutons!! Some pan grilled garlic breads are my personal favourite. With the wholesome goodness of pumpkin alongside the flavour of smoky and lusciously sweet roasted red capsicum this hearty and filling soup will soon be your family favourite. Serve as a main or just an entrée.
 
Today's post is specially for all my readers in the northern hemisphere who has been battling the madness of winter. Enjoy a cuppa or a bowl full of this roasted bell pepper and butternut soup and warm up your souls. This soup is also great when served chilled. For me a bowl full is perfect for every season.

A complete Vegan's Delight, just use vegetable stock instead of chicken stock. You may also use stock cubes and add plain water.
 
To make Roasted Red Capsicum and Butternut Soup you will need :
 
1kg Pumpkin (washed, peeled and cubed)
1large Spanish (Red) Onion
1large Red capsicum
2-3 tablespoon of Butter or Olive Oil.
2-3 clove of Garlic ( no need to peel)
Handful of Basil Leaves
4-5 cups of Chicken/Vegetable stock
1cup milk or single pouring Cream
Chopped Spring Onions for garnish
OR chopped Chives for garnish
Sour Cream for serving
Salt to Season (if needed)
1/4 teaspoon Nutmeg Powder   
1/4 teaspoon White Pepper
Freshly ground Black Pepper to season
 
Step 1:  Preheat Oven to 200 degrees.
 
Step 2: Coat 1 whole capsicum with olive oil and place in a baking dish. Throw in the garlic cloves in the same dish and roast for about 20 mins. Do not over roast or else the garlic will burn and taste bitter. 
 
 
Once the skin starts to blacken and u see blisters on the skin your capsicum is ready. Carefully remove from the oven  using oven gloves cover with aluminium foil and let it rest until cool. Remove foil and peel skin off .Remove all seeds if any from inside. Set aside in the same dish. Do not discard the valuable juice and oil in the dish from the roasted capsicum. This is your flavour booster. Also gently squeeze the garlic cloves to extract the flesh and set aside with the capsicum in the same dish. Discard all peels.


Step 4: In a saucepan heat butter or olive oil. Once the butter is hot quickly add the onions. Fry until light brown .
 
Step 5: Add the Pumpkins. Cook for 5-10 mins on medium heat.
 
Step 6: Throw in Basil Leaves, nutmeg powder, white pepper powder, and add the roasted capsicum and garlic along with the juice from roasting.
 
Step 7: Add Chicken stock cubes and water or pour in ready chicken stock.
 
Step 8:  Bring it to boil. Cover and cook until the pumpkins are tender. This should take approximately 25-30 mins on medium heat.
 
Step 9: Check Seasoning.  
 
U may even cook this in a pressure pan. Cook until 4-5 whistles go off. This recipe is good to yield 4 servings.


Step 8 Use a blender and blend to a smooth puree. Add milk or cream and blend until combined on low speed. 
 
Spoon into bowls and season with some black pepper , garnish with spring onions and dollop of sour cream. If you do not wish to use dairy such as milk or cream try using coconut cream or coconut milk for a delicious twist. You may even use some chopped chives for garnish along with some grated parmesan cheese.

   
My Kid's are just crazy about soup. That is another reason why cook this so often. Ahhhhhh!! That makes my job sooo much easier. Excellent for those tired nights. Quick and easy dinner with no fuss at all. So don't have any doubts at all. Print this recipe and enjoy this delish for your dinner tonight!!


Enjoy….

Thank you for stopping by! If you like this post please leave a feedback. For regular updates on more mouth-watering and exclusive recipes  "LIKE" my page on facebook


With deep care


Indrani..


01 10